Review
Review Arsenal Kiev 4
35 mm Rangefinder Camera, 1978
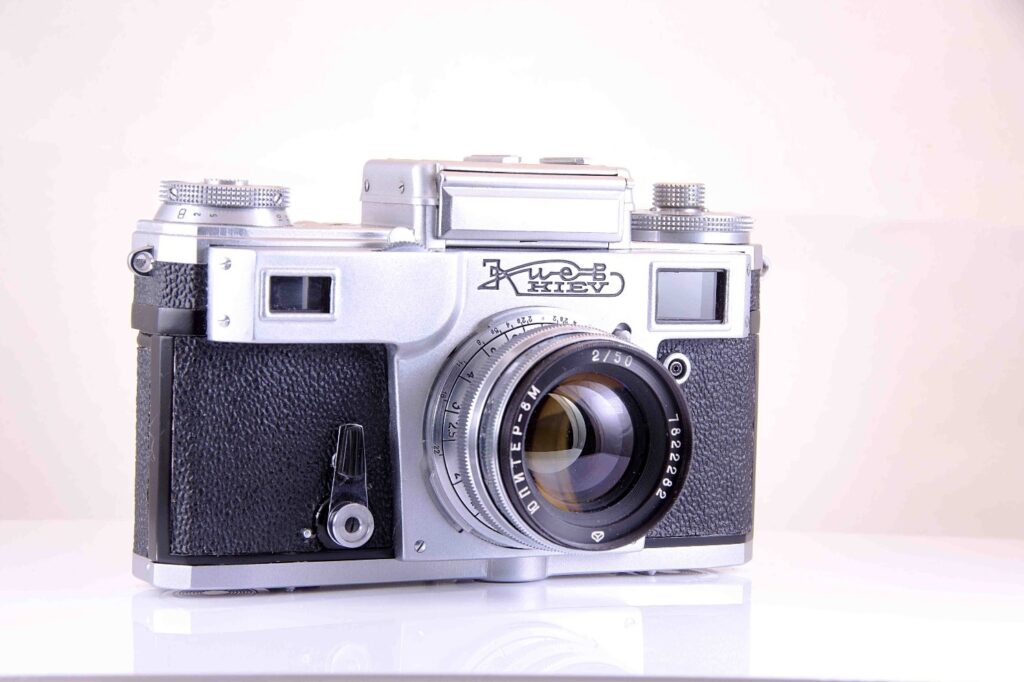
The history of the Arsenal Kiev 4(A) camera is closely related to the history of the Zeiss Contax II camera.
Welcome to Single Lens Relaxed Photography (SLRP), a website I have set up in 2017 to share my ideas and insights in (digital) photography. My name is Hubregt Visser and I’m an amateur photographer. Since 2017 my interest has shifted from digital to analog photography and this is reflected in this website that now (since 2023) concentrates on analog photography. You will find here posts on analog camera reviews, cleaning, lubrication and adjustment (CLA) of cameras and lenses and some general information on photography techniques.
The history of the Arsenal Kiev 4(A) camera is closely related to the history of the Zeiss Contax II camera.
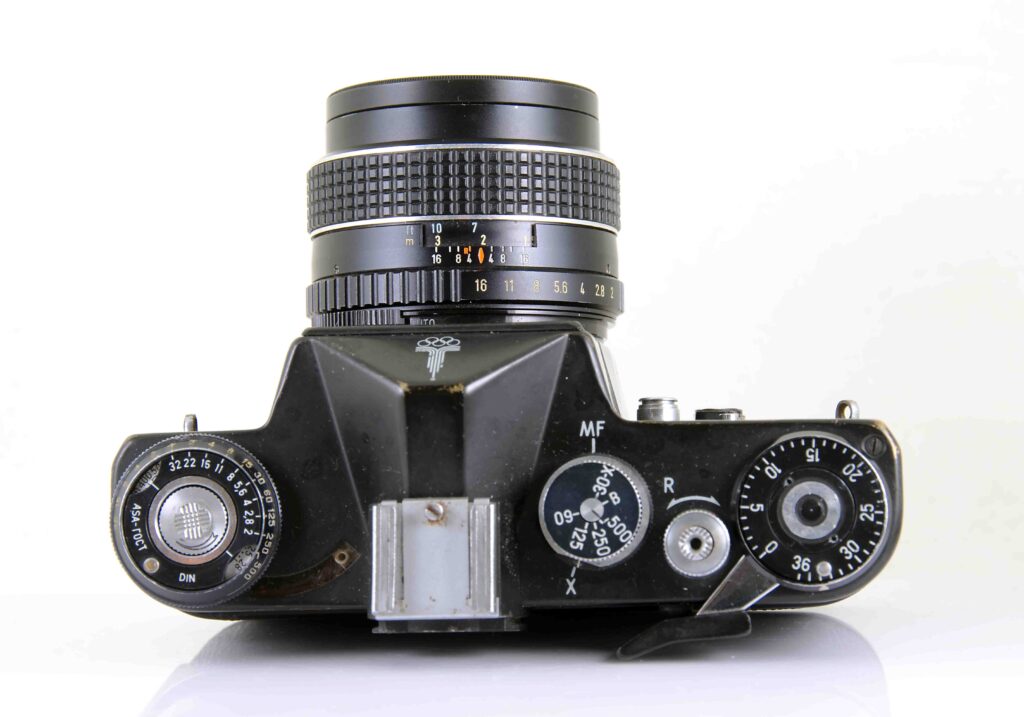
The Zenit line of SLR cameras comes from the Russian mechanical factory of Krasnogorsk near Moscow. The official factory name is Krasnogorski Mekhanicheskii Zavod (KMZ). The Zenit SLR is an evolution from the Zorki rangefinder camera. That rangefinder was a copy and further evolution of the German Leica ii camera. The SLR creation involves removing the Zorki rangefinder optics from the top and placing a ground glass instead. For a full KMZ Zenit EM review please see my post on the Kosmofoto website.
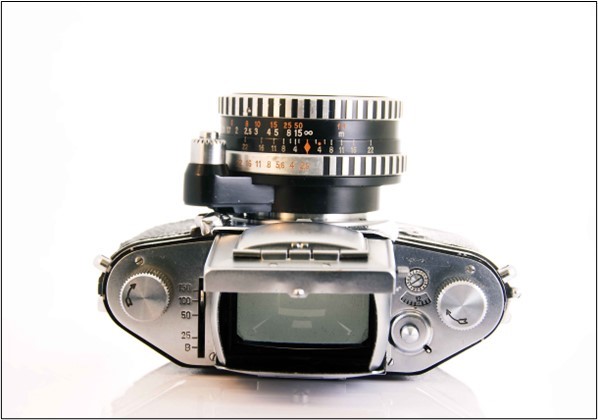
You love them or you hate them: The Exakta and the entry-level Exa 35 mm Single Lens Reflex (SLR) cameras. They are special, or at least different with their trapezoidal shape and left-front positioned shutter button. The Exa is even more special, with its special shutter and its gear-shift shutter speed selector.
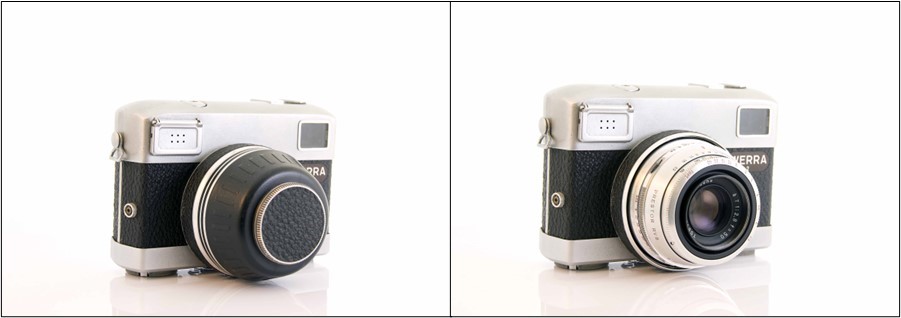
Browsing through the contents of an online camera auction house, I came across a Werra camera. This 1950s-1960s viewfinder camera comes from the former German Democratic Republic (East Germany). It was new for me and it’s peculiar – though quite appealing – appearance grabbed my attention. On a local digital marketplace, I then found a Werra 2 for a (for me) acceptable price. Now this little piece of genius early-postwar German engineering is mine.
 When you are interested in photography you will start reading books on the subject or browsing the web. Eventually you will encounter the rule of thirds. Or maybe, when playing around with your camera settings, you found this grid you can overlay on your screen or viewfinder. You may have wondered about the use of it. Both have to do with picture composition and creating appealing pictures.
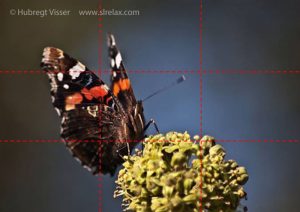
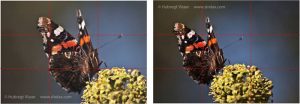
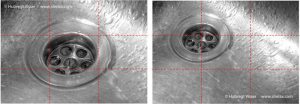
For applying the rule of thirds you are supposed to divide the screen/picture in nine equal segments by dividing the horizontal and vertical sides in three equal parts. Then, if you place your main subject on the intersection of any of the horizontal and vertical lines, you will have created a composition that is appealing to most human beings. In the examples underneath I show two examples where I first placed the main subject in the centre and then moved it to one or two of the intersection points.
Use of the rule of thirds
For most people the pictures on the right are more appealing than the ones on the left. How come? It all has to do with the ‘divine proportion’ or divine section, golden ratio, or golden cut.
The divine proportion is a ratio of dimensions that is encountered in nature in e.g. the positions of branches along the stem of a plant, the veins in leaves and the proportions of the different body parts of a human. Mathematically, the golden ratio determines how the lengths of two line segments relate to each other.

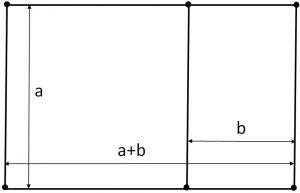
The golden ratio
If in the above figure the lengths a and b relate to each other identically as the lengths a+b and a, or put in an equation a/b = (a+b)/a, then the ratio of a and b is called the golden ratio. Working out the math yields that a/b = 1.61803…, the dots meaning that there is an infinite number of decimals.
If we now make a rectangle having horizontal size a+b as in the above line segment and vertical size a, the lengths of the sides of the rectangle have the divine proportion. Then, applying this divine proportion to the horizontal length results in a smaller (standing) rectangle that also has the divine proportion, see the figure underneath.
The golden ratio in two dimensions
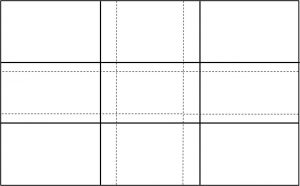
We can divide the small rectangle in two smaller ones, again having the divine proportion. The dividing of the large rectangle in smaller ones can of course be done in different directions. If we do this two levels deep and connect the line segments, we get the structure as shown below. The crossings of the horizontal and vertical lines are the golden cuts.
Golden cuts
Our eyes, when looking at a scene, will by instinct scan the divine proportion positions, i.e. the crossings of the horizontal and vertical lines. Thus, positioning the subjects we photograph there will in general lead to compositions that are considered as appealing.
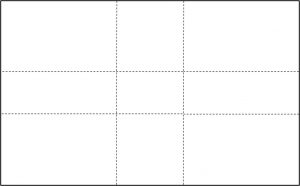
Since it is practically impossible to mentally divide a scene up in parts of which the lengths relate to each other as 1.61803… (at least it is for me and I’m a nerd), we aren’t that far off if we divide in thirds instead, see the figure underneath.
Relation between the golden cuts and the rule of thirds
The purists among us will opt for the real golden cut. For me, the rule of thirds is good enough. And then, this ‘rule’ is not carved in stone. It’s more like a guideline. If your main object is somewhere near one of the thirds lines and / or intersections, it’s OK.
A few more examples:
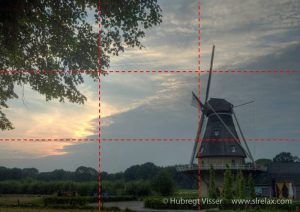
Dutch windmill at sunset
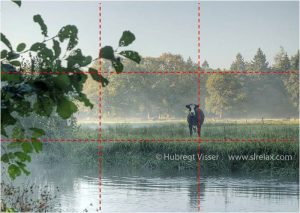
Cow in the morning
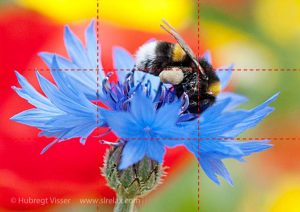
Bumblebee on a cornflower

Coffee in London
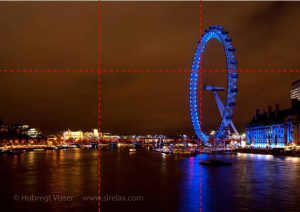
The London Eye at night
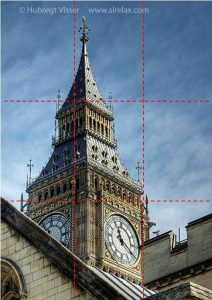
Big Ben
One final thing: As with all rules, being too strict about it will be counterproductive. So let’s not call it ‘the rule of thirds’ anymore but rather ‘the suggestion of thirds’.
Recently I purchased a Nikon EM camera really cheap. The camera body was OK; the light meter did not even show the ‘jumpy needle syndrome’. With the camera came a Nikon 50mm f/1.8 E lens. This lens showed some traces of internal fungus. I had read about it, but had never seen it in reality. At that point I was experienced in replacing camera light seals and mirror dampers, but did not feel confident enough for cleaning a Nikon 50mm f/1.8 E lens. I was reluctant in trying to open the lens to clean the fungus. I decided that the fungus was not really effecting the pictures being taken.
 Photography is all about light. To get the exposure of our picture right, we need to balance the aperture size and shutter speed. This can become tricky in low light situations. If both aperture and shutter speed don’t suffice to get the exposure right, we can increase the ISO value. The ISO value is a measure for the sensitivity of the sensor. ISO stands for International Standards Organization.
The aperture is the opening, iris or diaphragm after the lens. It controls how much light will fall on the sensor. With adjustable blades this aperture can be arranged in a limited number of sizes. These sizes are such that every next smaller opening halves the amount of light falling on the sensor. We measure the aperture openings as fractions of the focal distance of the objective.

Three apertures for a 50mm objective. From left to right: f/2.8, f/5.6 and f/22.
So we can use the aperture size as a control for the exposure of our picture. We can also use it to select which part of our picture will be in focus.
The shutter speed (which isn’t a speed but an exposure time) determines how long we will let light fall on the sensor. Also the shutter speed can be chosen as one of a limited series. The different speeds are such that every next smaller number halves the amount of light falling on the sensor. So, we see something in common with the aperture sizes we can choose from.
Balancing aperture size and shutter speed
 Through selecting the range of focus in your picture, you can draw attention to the elements you want to emphasize. You can accomplish this by selecting the focal point and by choosing the appropriate aperture size. Understanding Depth Of Field (DOF) is a powerful creative tool. We will explain how decreasing the aperture size may compensate – to a certain degree – being out of focus. Therefore we will go through some (very) basic physics, starting with the concept of focal distance.