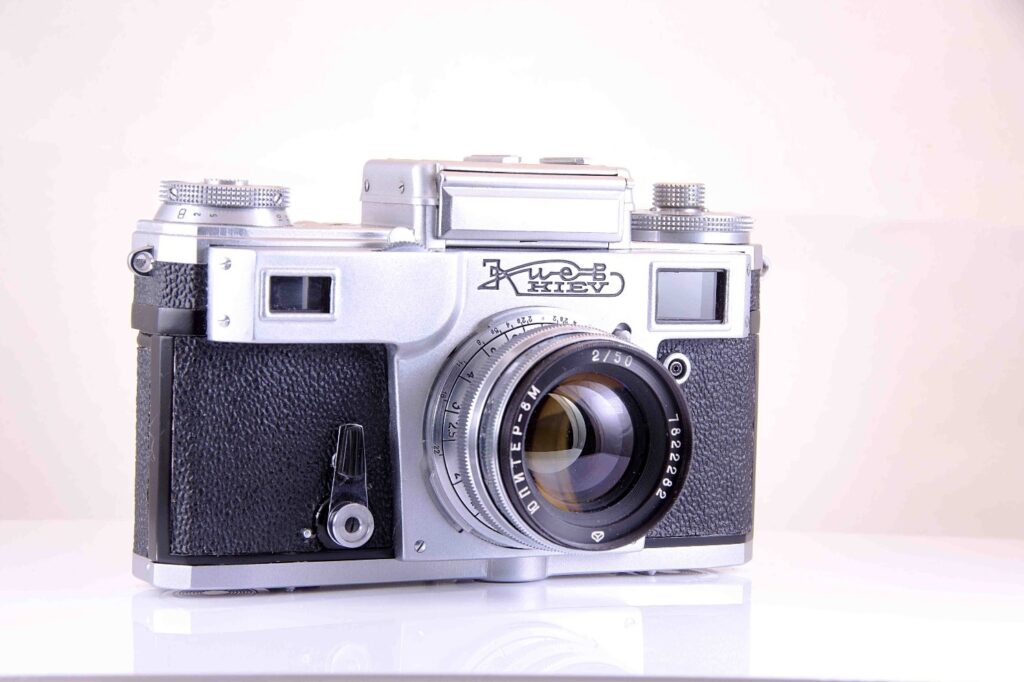
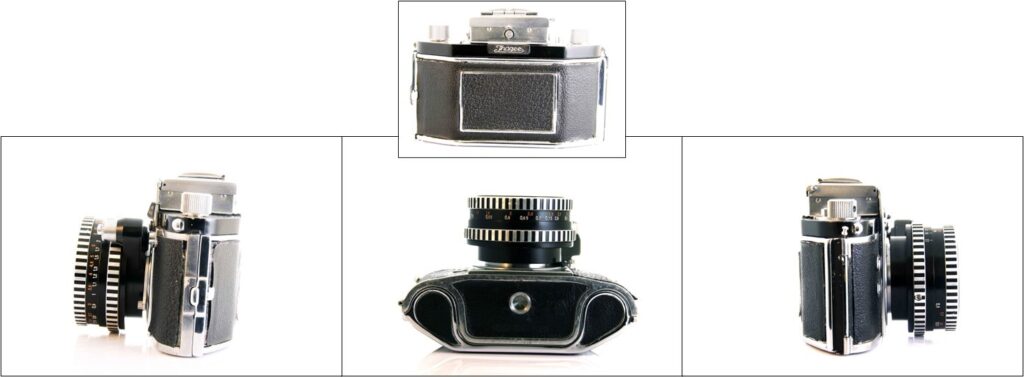
35mm viewfinder camera, 1961
Browsing through the contents of an online camera auction house, I came across a Werra camera. This 1950s-1960s viewfinder camera comes from the former German Democratic Republic (East Germany). It was new for me and it’s peculiar – though quite appealing – appearance grabbed my attention. On a local digital marketplace, I then found a Werra 2 for a (for me) acceptable price. Now this little piece of genius early-postwar German engineering is mine.
A bit of history
The first thing that stands out is that this camera is made by Carl Zeiss Jena, a lens manufacturer. A lens manufacturer making a camera needs a bit of explaining and has all to do with the end of the second World War.
Before the war
Before the war, the Dresden area in Germany was the centre of international camera development and manufacturing. Many of the important companies in this area merged in 1926 into the Zeiss Ikon AG (joint-stock company). This merge was on initiative of the Zeiss foundation that already owned ICA, one of the merging companies. The Carl Zeiss lens company was based in Jena, about 175 km west of Dresden.
Iconic cameras stem from the Dresden area, like the Zeiss-Ikon Contax combined viewfinder-rangefinder camera (competitor of the Leica camera) and the Ihagee Kine Exakta, the first 35mm single lens reflex camera.
Immediately after the war
Between 13 and 15 February 1945, four raids of joint British and American aerial bombing destroyed more than 6.5 square kilometres of the city centre of Dresden. This bombing was of course a blow to the camera manufacturing industry; it destroyed about 25% percent of the Dresden industry.
A second blow followed with the Russian occupation after the war. That started in August of 1945, with the dismantling of the remains of the Contax production line in Dresden and shipping to Kiev in Ukrain, then part of the USSR. A Contax production line also existed at Carl Zeiss Jena immediately after the war. After a short production run this line was also dismantled and shipped to Kiev. This all as a reparation for the war. Also the technicians involved in the Contax production were deported with the machines to Kiev. There, Contax production was continued. First with remaining spare parts from Germany and later with locally made components, resulting in the Kiev 4A Contax copy.
Later after the war
At the beginning of the 1950s, deported German technicians, having trained Ukrainian and Russian technicians in Kiev and no longer needed, returned to Jena. There, they found a company that had no work for them. Work was created for them by the demand to design and produce a cheap amateur camera. That camera became the Werra. The Werra name stems from the river running trough the town of Eisfeld were production was planned to take place. The original Werra had a fixed triplet lens and no light meter or rangefinder. Later, in several models, the Werra got a four-element Tessar and a light meter as well as a rangefinder. The different models underwent several updates during the production time of the Werra cameras, spanning from 1954 to 1968. Here, we have a Werra 2a, second generation, from 1961.
Werra 2a characteristics
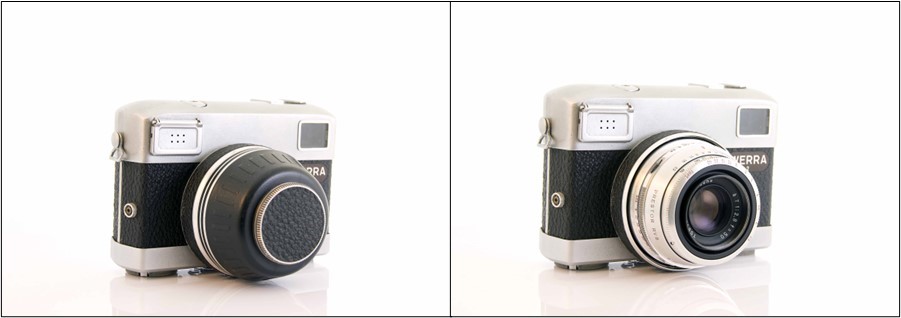
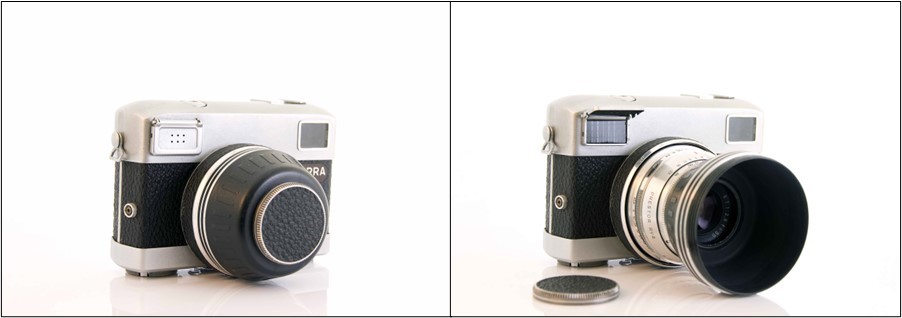
The Werra is a 35mm viewfinder camera in a Bauhaus-like style: minimalistic and functional. On top of the camera is a shutter. All other controls concentrate at the lens and at the bottom. To transport the film and to cock the shutter, you will rotate/twist the base of the lens. The Werra 2a has an uncoupled selenium light meter and a lens with mechanically coupled aperture and shutter speed. The lens cover doubles as a lens shade.
Next follows a list of all the camera characteristics:
- Produced 1954-1968, Carl Zeiss Jena, former GDR
- Type Viewfinder
- Film type 135 (35 mm)
- Negative size 24 mm x 36 mm
- Dimensions 115 mm x 85 mm x 85 mm (with lens cover, 115 mm x 85 mm x 75 mm without)
- Weight 607 g (with lens cover, 568 g without)
- Lens mount none (fixed lens)
- Lens Tessar (T) 50mm f/2.8
- Focal range 0.8 m to infinity
- Filter size 5 x 0.5 mm threaded
- Shutter Prestor RVS (central metal leaf shutter)
- Shutter speeds B, 1, 1/2, 1/4, 1/8, 1/15, 1/30, 1/60, 1/125, 1/250, 1/750 s
- Aperture values f/2.8, f/4, f/5.6, f/8, f/11, f/16, f/22
- Viewfinder Optical viewfinder with parallax markers
- Exposure meter selenium
- Self-timer
- Accessory shoe (cold)
- PC sync flash contact M (flash bulbs) and X (electronic flash)
Operation and dials
The main characteristics of the Werra cameras are the film transport and cocking of the shutter. Both occur with a single twist of the base of the lens. The direction is clockwise looking at the front of the camera. The transport-and-cocking ring bounces back after twisting.
Camera top
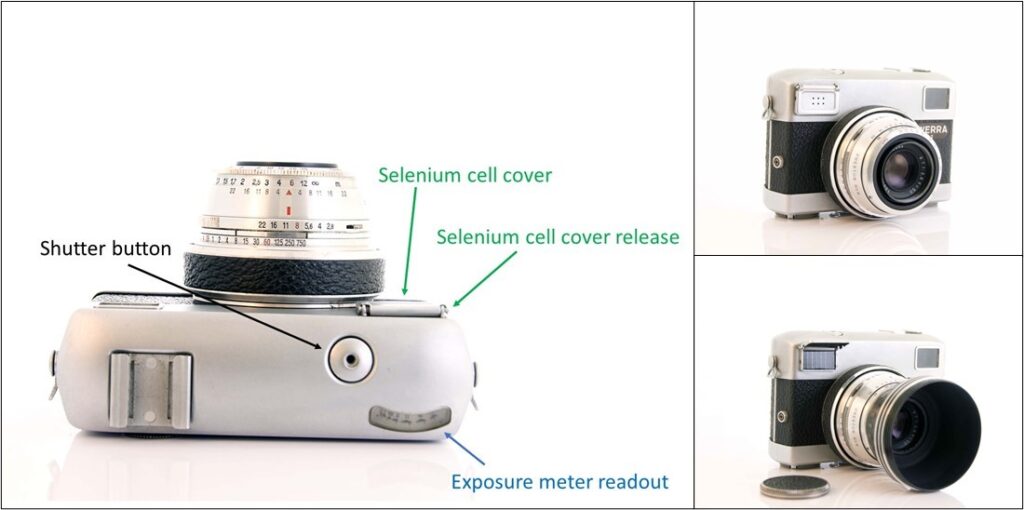
The shutter button is on the top of the camera, flush with the housing. In this shutter button, a thread is available for a cable release.
On the top we will also find an accessory shoe (cold) and the exposure meter readout. The selenium cell of this exposure meter is visible on the front right, closed off with a cover with an array of holes in it. Pressing the hinge on the outside of the camera will open up the cover exposing the selenium cell in full.
Before explaining the use of the uncoupled exposure meter, i.e., the way of transferring the readout value to shutter speed and aperture value, we will first need to set the film sensitivity.
Lens bottom
We will set the film sensitivity in ASA (American Standard Association) or DIN (Deutsche Industrie Norm), at the bottom of the lens.
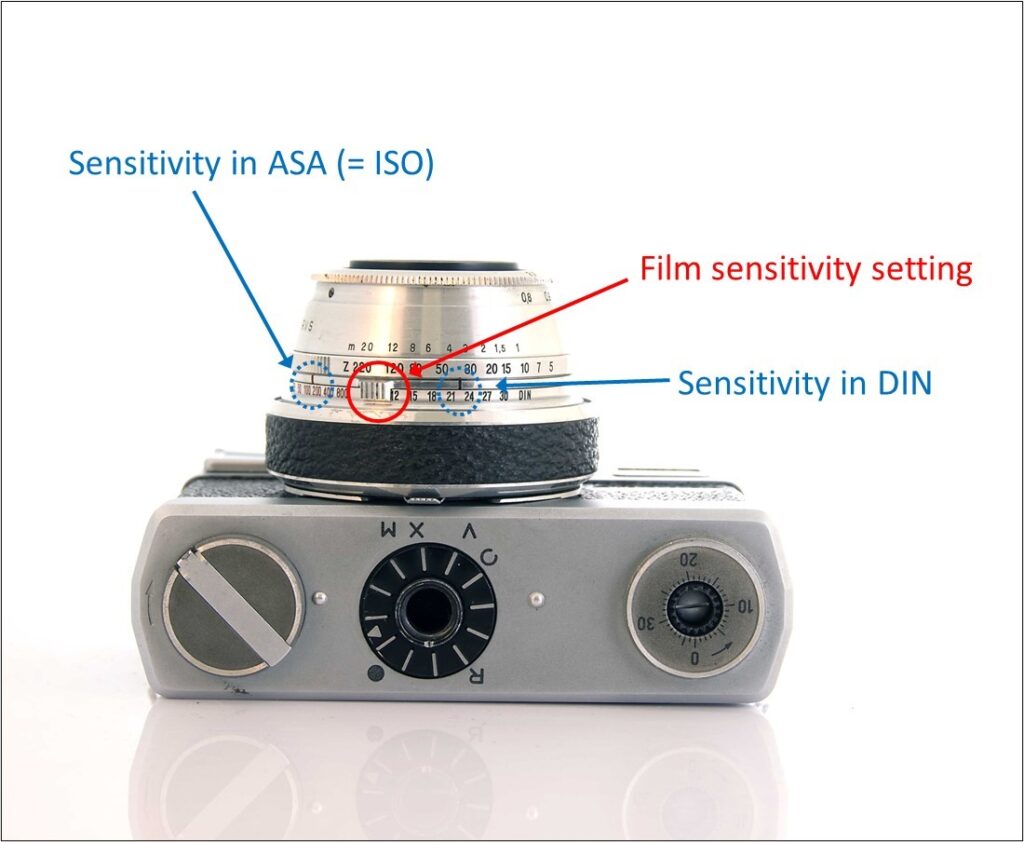
This will be easy since ASA values are equal to the nowadays used ISO (International Standard Organisation) values. We will come back to the rest of the dials found at the bottom of the camera after explaining the use of the exposure meter.
Exposure reading
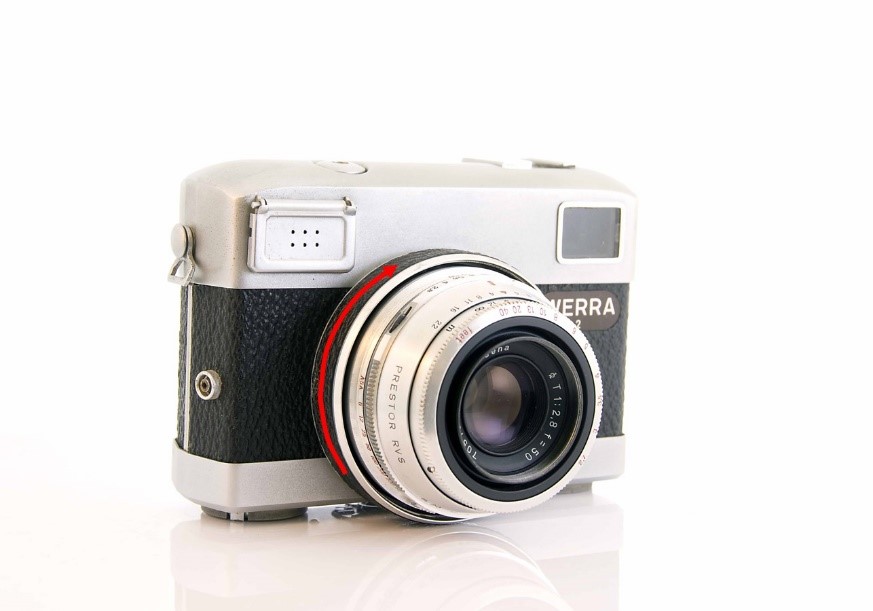
Peferably, we will use the exposure meter with the cover closed. That is what the manual calls favourable light conditions. If, with sufficient light (like outsight during a sunny day), we do see the exposure meter deflect, we need to notice the aperture value indicated. Next, we need to transfer this value to the settings on the lens for aperture and shutter speed. These two values are mechanically coupled.
As a test, I took out the camera on a dark December day. I set the sensitivity to ISO (ASA) 400. The meter did not deflect with the cover down, so I lifted the cover and read a value of f/16. See the photograph below.
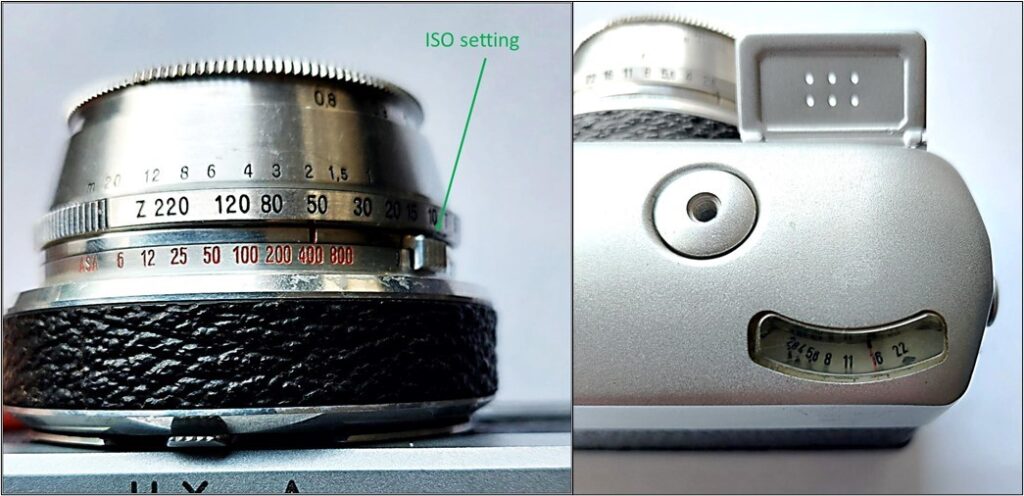
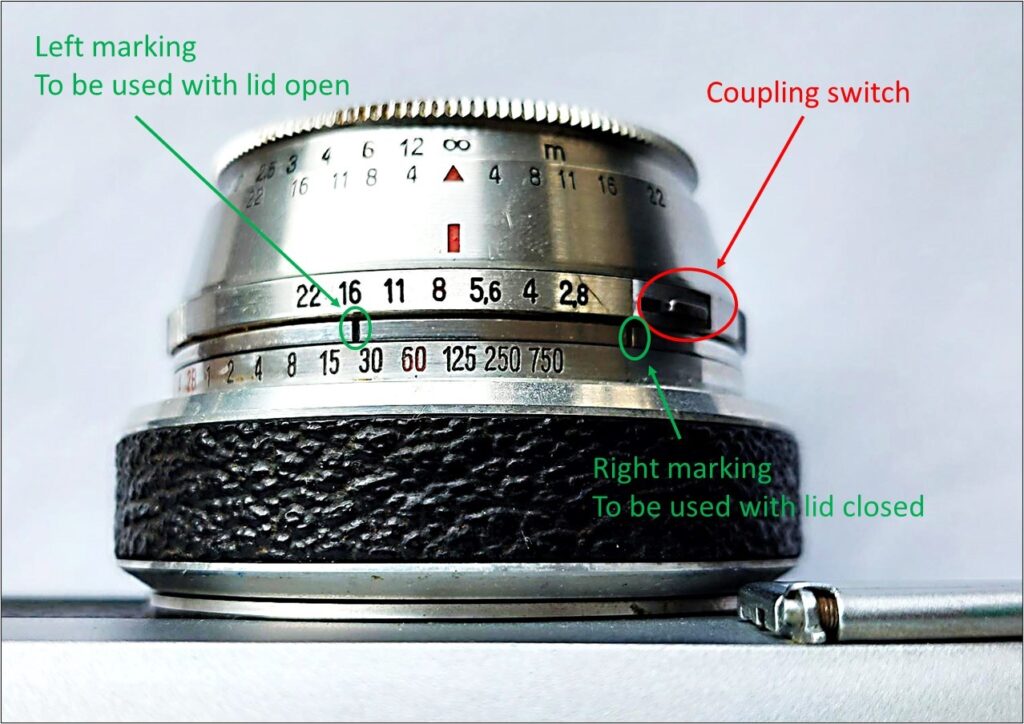
Now, going to the lens, on the middle ring – showing the f-values – I pressed the coupling switch and turned the ring to align the 16-value with the left vertical marking. Had I been able to read the exposure meter with the lid closed, I should have aligned with the right vertical marking.
Exposure setting
Now, having made this alignment, I will not touch the coupling switch anymore. Turning the ‘f-ring’ gives all possible aperture values and shutter times yielding the right exposure. In the example above, we see that the camera is set (red mark) for an aperture value between f/5.6 and f/8 and a shutter time of 1/125 seconds. The shutter time is indicated on the bottom ring, where 125 means 1/125 s. Likewise, the aperture indication 8 means f/8.
The shutter is a Preston RVS shutter. I cannot find an explanation for the abbreviation RVS. But, I know that shutters that had to be cocked manually did get the designation ‘S’, from the German Spannen (cocking). So, my guess is that RVS stands for Rotierender Verschluss S, which translates to rotating shutter S.
In the right picture shown below, I have turned the f-ring to the position for an aperture f/16. We do see a shutter time between 1/15 and 1/30 seconds. We also know that for every increase in f-value (a stop), the shutter time should be halved (a stop) to get the same amount of light on the film. So, we see how all f-values and shutter times on both rings form combinations that give the same amount of light. By turning the f-ring, we set the desired combination at the red mark. f/8 with a shutter speed between 1/60 and 1/125 s (left photograph) is equivalent to f/16 with a shutter speed between 1/15 and 1/30 s (right photograph) and so on.

It shows that a fast shutter speed will require a large aperture opening (small f-number value) and a small aperture opening (large f-number value) will require a slow shutter speed.
Depth of field
We alo require a small aperture opening for creating a large depth area in focus in the picture. This in-focus area is called the depth of field (dof). We can read this dof from the scale at the front ring of the lens. With this front ring we set the distance of the subject we want to photograph. This distance is measured – or more likely – guessed. The distance is set against the red triangle. In the pictures above I have set the distance to infinity (in practice, everything further away than, say, 15 m).
The numbers on both sides of the red triangle are f-values and form a depth of field (dof) scale. In the left photograph above, the f-value is 8. Then, from the dof-scale we read that everything from a distance of 6 m to infinity will be in focus. In the right photograph the f-value is 16. Now we read from the dof-scale that everything from 3 m to infinity will be in focus.
The shutter speeds larger than 1 second, indicated in red on the left of B on the shutter speed ring, are merely there as a reminder. The shutter is in B(ulb) position for all these ‘red’ values and timing must be done manually.
Finally, as a test to see if the selenium exposure meter is still functioning properly (the cells are known to deteriorate under the influence of light) I have measured the light with a handheld meter.

The meter shows that for ISO 400, a f-value of 16 corresponds to a shutter time between 1/15 and 1/30 s. So, after more than 60 years, the exposure meter is still functioning correctly.
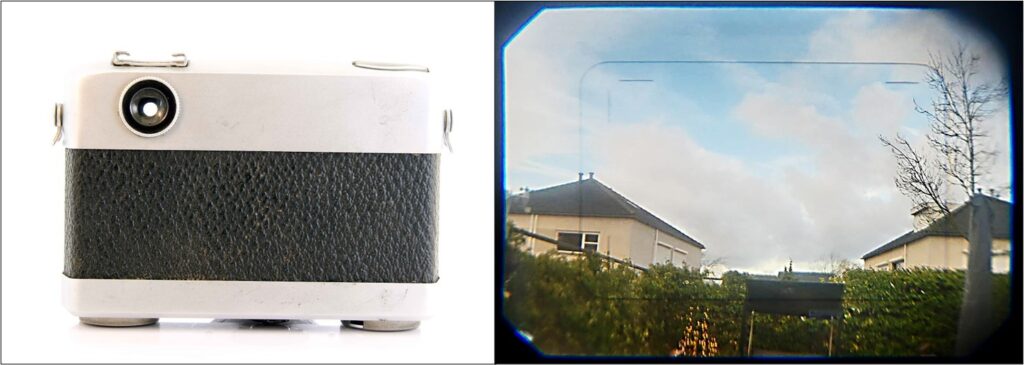
Viewfinder
The viewfinder is straight forward, giving a small view reduction. In the viewfinder, we see clear parallax markings. Rotating the knurled ring on the viewing side provides a diopter adjustment.
 .
.
Camera bottom
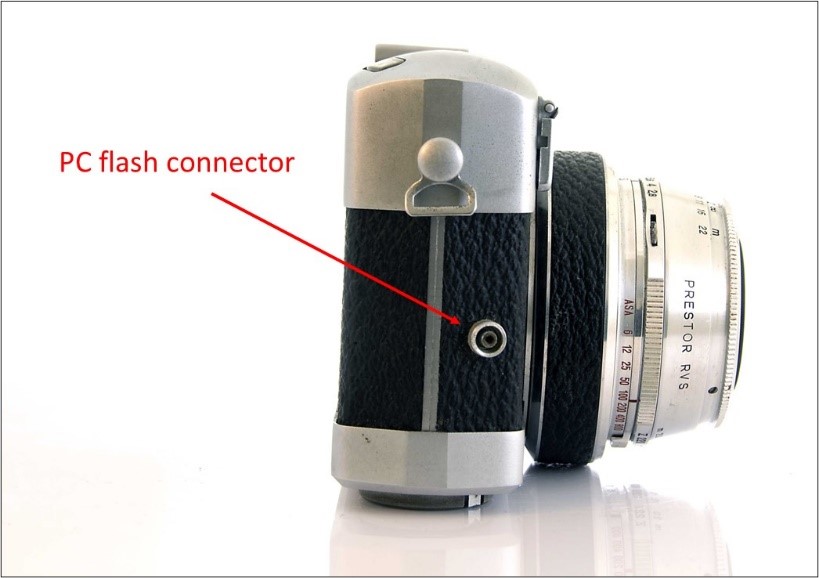
If we move to the bottom of the camera, we see a flash synchronization switch on the lens base. The flash synchronization connection is a Prontor/Compur (PC) one and is found on the right side of the camera. For using flash bulbs, we put the switch into the M-position ,for using an electronic flash, we choose the X-position. The flash synchronization switch also serves for activating the self-timer. Therefore, we shift the switch to the V-position. My guess is that V stands for Verzögerung, the German word for delay.
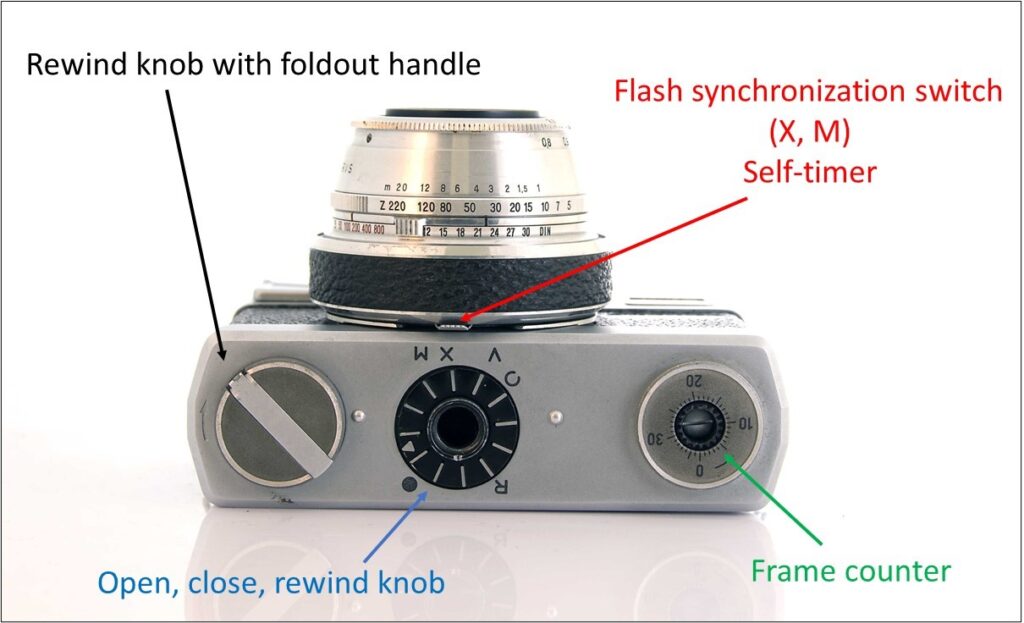
In the middle of the bottom is a knob for closing (●) or opening (C) the camera, or for rewinding (R) the film. In the centre of that knob is a 3/8 inch thread tripod socket. To the left is a rewind knob with foldout handle and to the right is an additive frame counter. The user needs to manually reset this counter upon loading a new film.
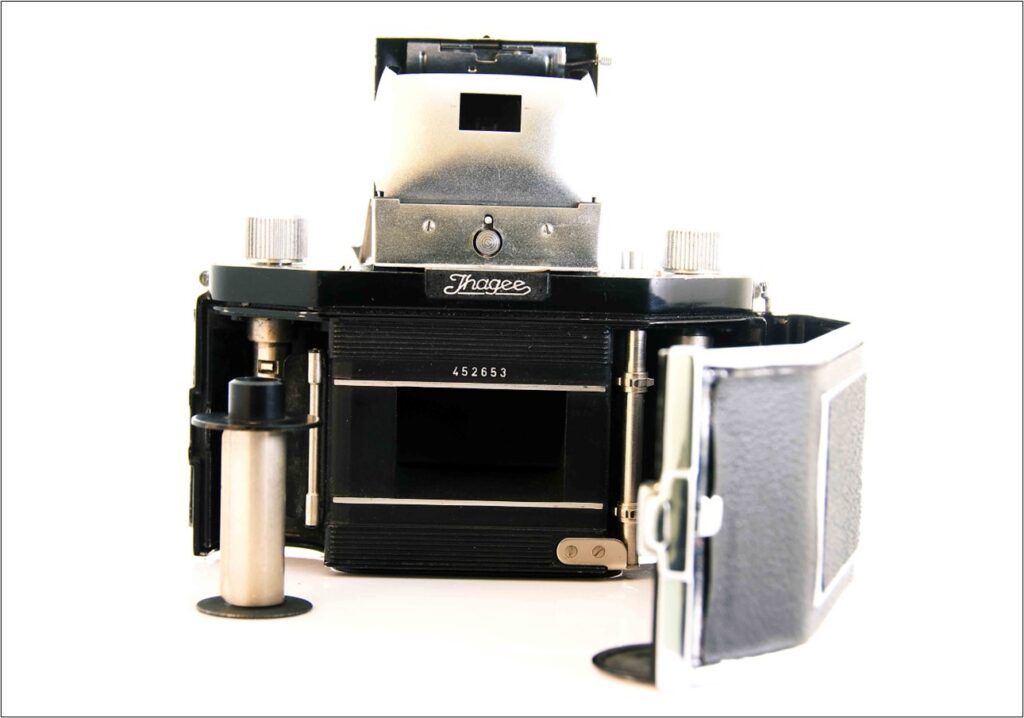
Opening the camera
If we open the camera, the whole backside with bottom comes off.
The camera accepts standard 35 mm cassettes on the right and spools from right to left. The pressure plate in the back and the diagonal grooves in the film rails ensure that the film is kept flat in the focal plane.
All in all, this is a well-designed, high quality and certainly good looking camera. What remains to be found out is how well it performs in practice.
Werra 2 user experience
I loaded up my Werra 2 with a short roll of bulk Ilford FP4+, my favorite film, which was quite easy and set out for shooting some urban landscapes.
With its weight of over 0.6 kg, the camera feels comfortable in the hand. The right index finger falls naturally over the shutter button. The viewfinder is bright with well visible parallax marks. Measuring exposure and setting aperture and shutter time is easy.
I did miss a means of focusing though. I don’t feel comfortable with guessing distance. Therefore, I stuck to small aperture values to increase the dof and thus avoid blurry pictures.
The lens cap is another thing I don’t like in practice. First, you’ll have to screw off the end cap and keep it somewhere. Then you’ll have to screw off the lens cap itself and reversely screw it back on. The cap is made of plastic and I was very worried about cracking the cap by wrongly attaching it to the thread. I’ve seen Werra’s on ebay were this has happened and it’s not a pretty sight.
In putting on the shade as a cap again you’ll have to be careful not tightening it too much since that will result in advancing the film and cocking the shutter.
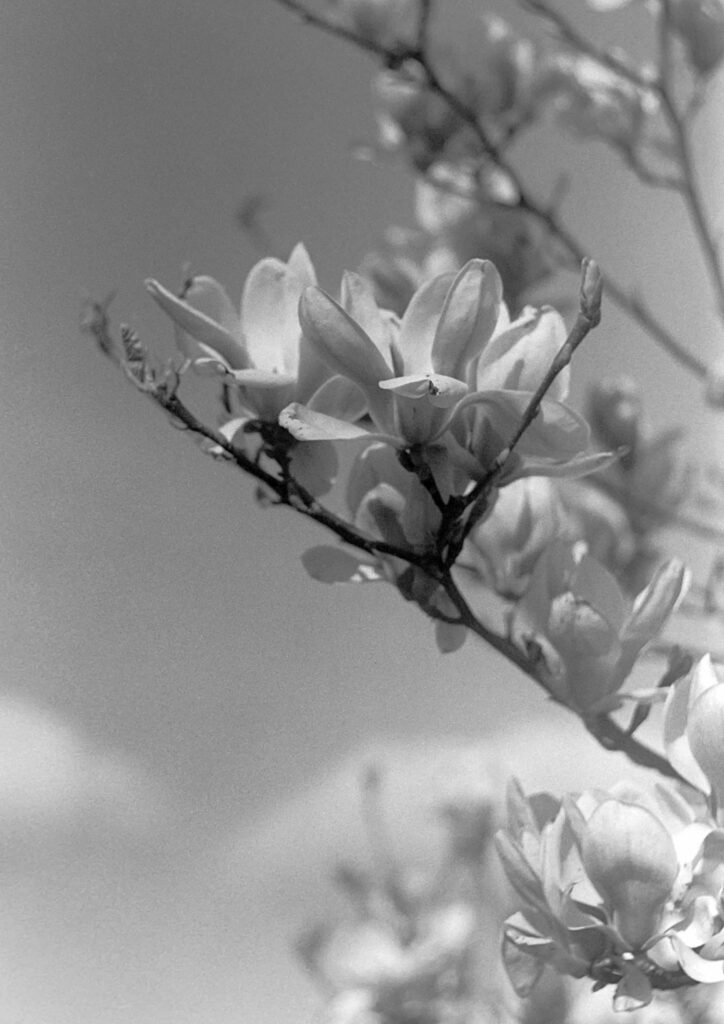
A few pictures I took are shown next. I’m pleased with the results; the Tessar performs well.
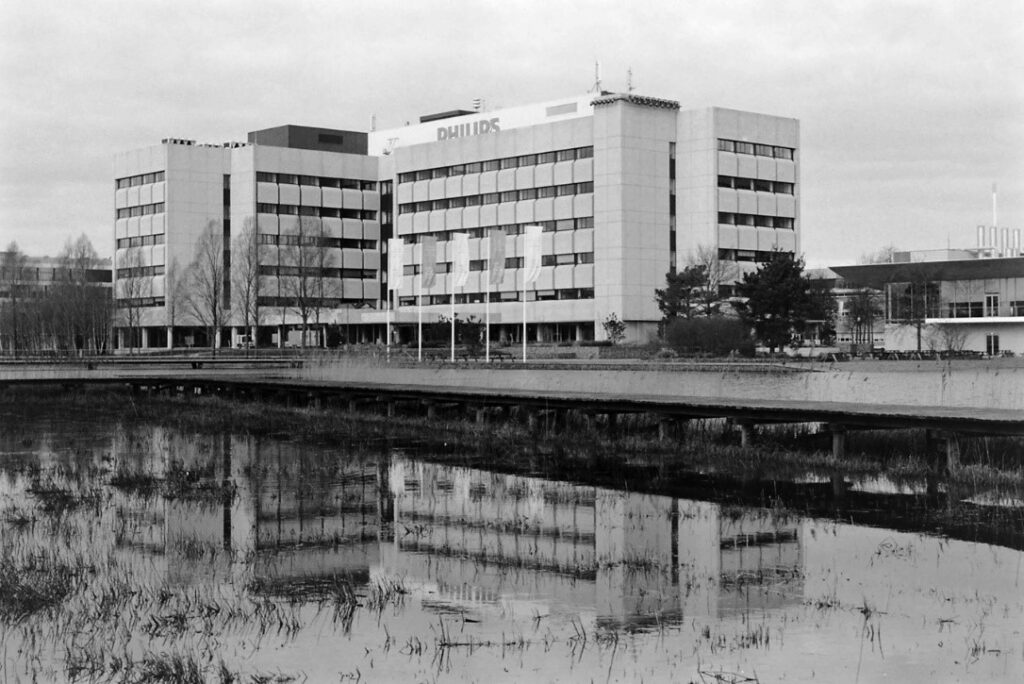
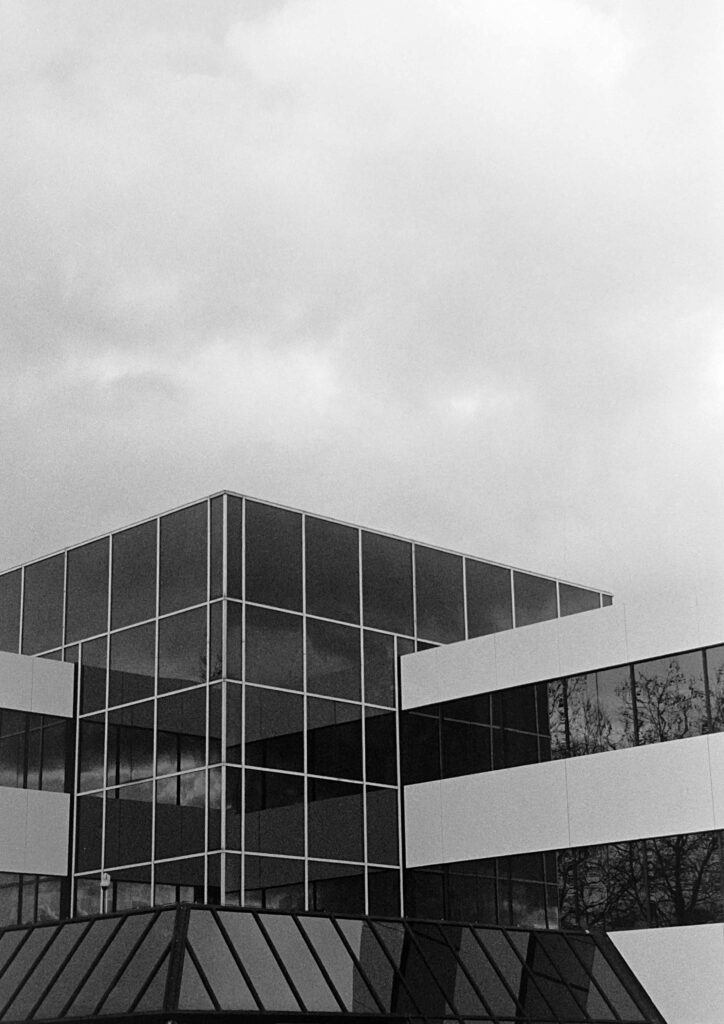
Office building at the High Tech Campus, Eindhoven, The Netherlands
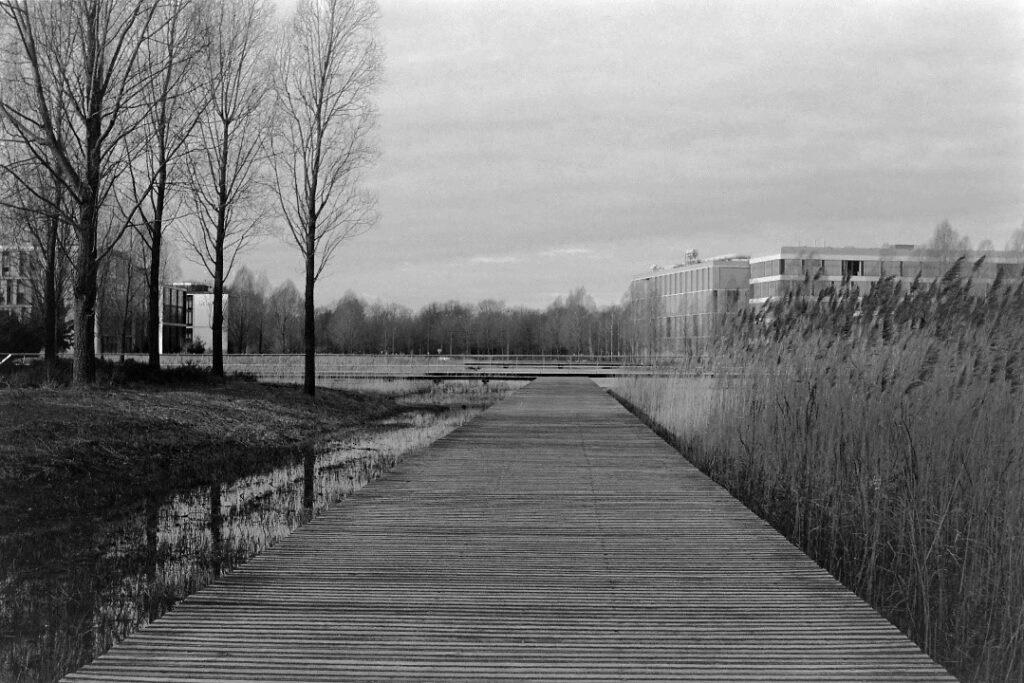
Walk way at the High Tech Campus, Eindhoven, The Netherlands
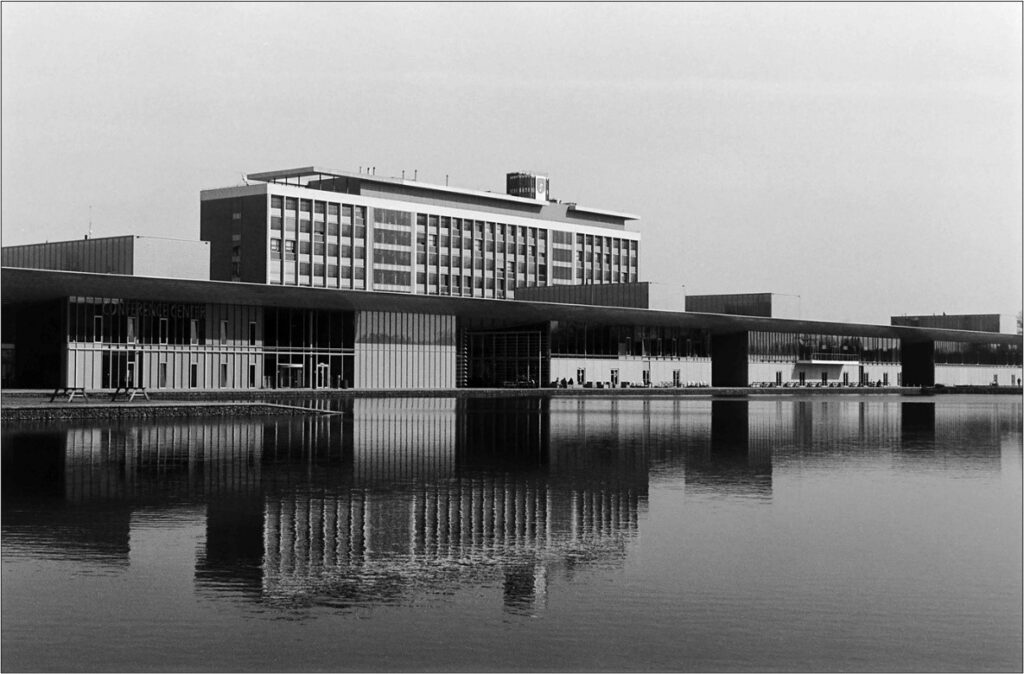
High Tech Campus, Eindhoven, The Netherlands
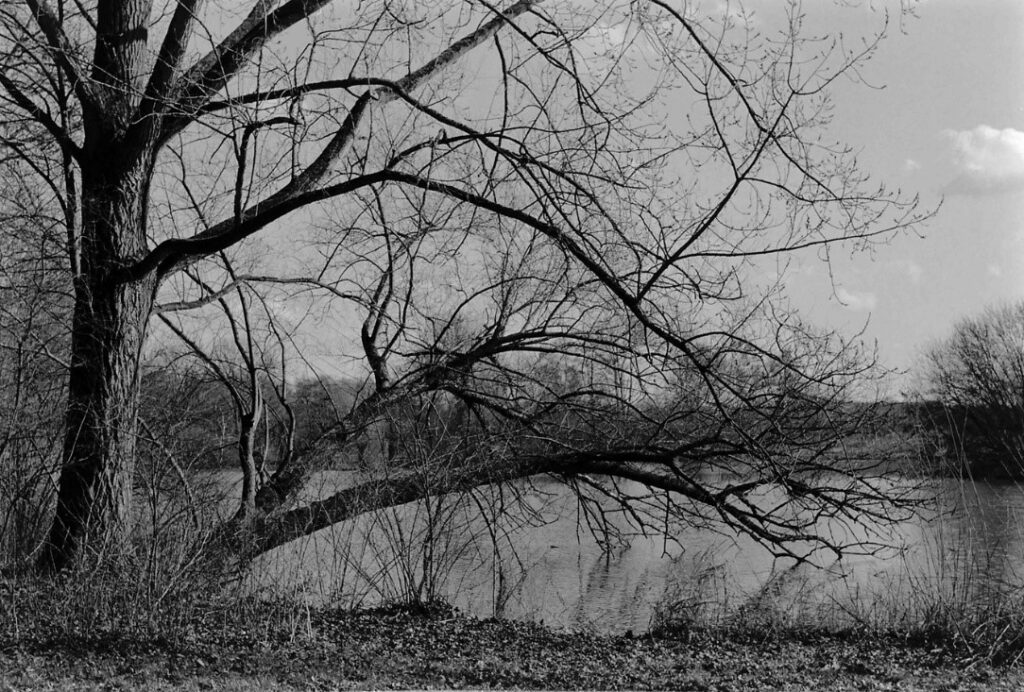
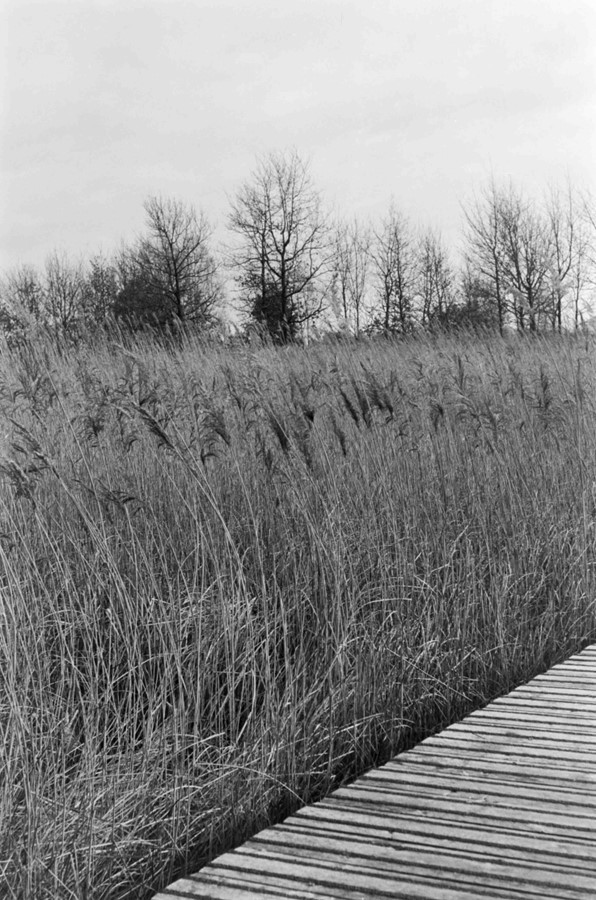
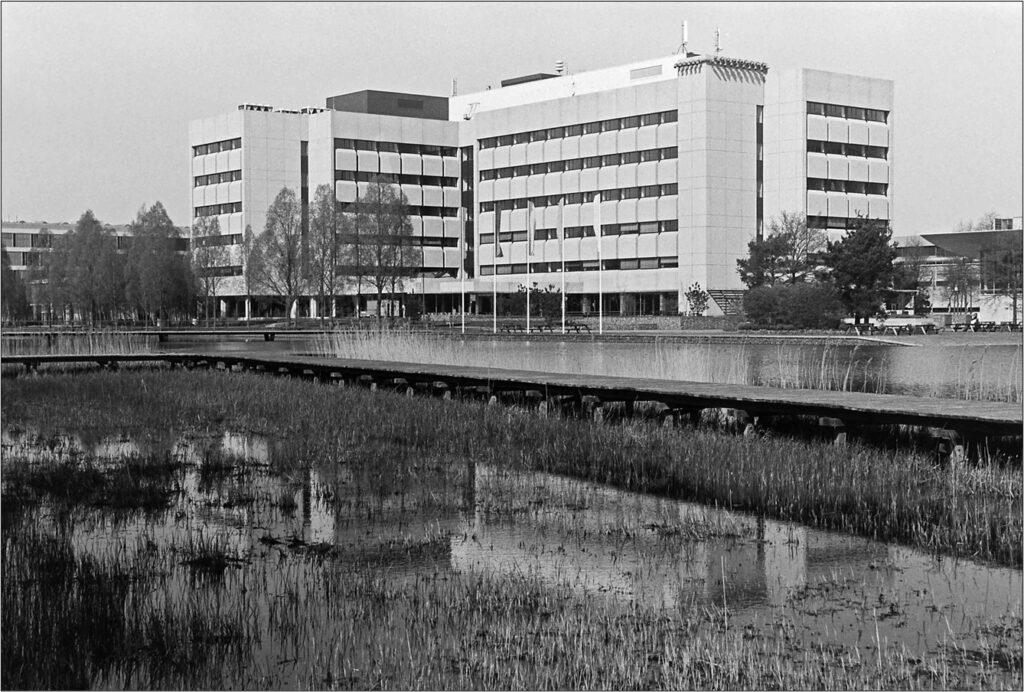
Lake at Hanenvoet Park, Eindhoven, The Netherlands
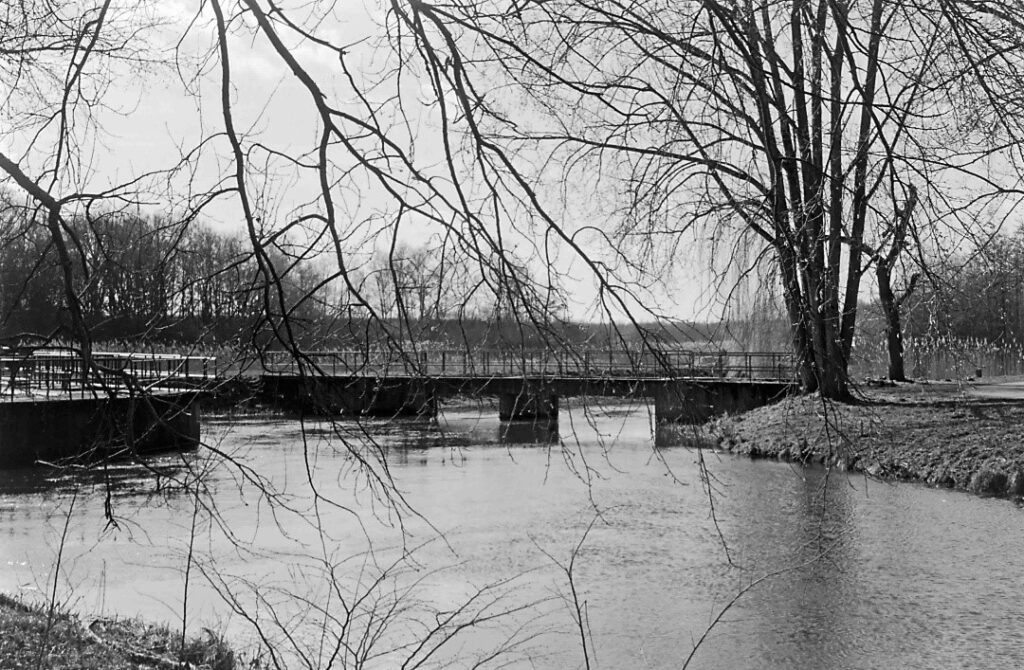
Bridge at Hanenvoet Park, Eindhoven, The Netherlands
Conclusion
The Werra 2 is a nice little camera. The camera is good to look at, the design is certainly different. The construction of the Werra is good, although I would have felt more comfortable with a metal lens cap / shade.
The Tessar lens performs well stopped down, but a lack of proper focusing has prevented me using the lens at larger apertures. I guess that a Werra 3 with rangefinder will be better suited for me.
The film advancing and shutter cocking is different. It works, but – for me – it brings no extra value in the field. The exposure meter amazingly still functions well after more than 60 years. The mechanically coupled aperture and shutter speed, which was customary in the 1960s (also the Zeiss Ikon Contarex and the Kodak Retina Reflex used this concept), takes some time to get used to, but is actually quite handy. The frame counter works but is very difficult to read. I guess that originally a dot of white paint was on it that has got lost over the years.
Next to being made of plastic, I find the handling of the two-part lens cap / shade quite cumbersome.
So, in the end I have to conclude that I liked experimenting with this camera, that I certainly appreciate its looks, but that, most likely, I will not be using this camera on a regular basis. I have many other cameras that are more satisfying to use and that are good lookers as well.

0 Comments